

How to Remove Stains from Tupperware containers
May 3, 2017 by admin
Filed under Cleaning Procedures and Measures for Controlling Pests
Comments Off
 Tupperware food storage containers are in great demand for space optimization, heating food in micro oven, popular food grade characteristics and saves lot of space in the refrigerator. Indian cooking involves lot of spices, aromas, colors and mainly oil. There are some delicacies like curries, pickles and sweets that require a layer of oil/ ghee in it to taste better.
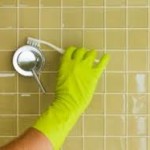
When containers are used to store such preparations it stains the container and lid. Commonly observed is with tomato sauces, tomato chutney. Even lunch boxes that store tamarind rice or tomato rice stains the container.
You have a good collection of Tupperware food storage containers and if few of them are stained due to storage you will not be able to use them confidently. Sometimes you feel like disposing them after several scrubs and repeated washing.
Here is some great news for the home makers. Go through the easy ways to get rid of the stains and restore your Tupperware food storage containers back to normalcy.
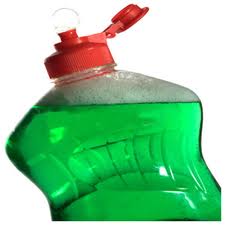
Easy ways to remove stains from Tupperware: Soak in automatic dish washing detergent
This is the primary method adapted by most homemakers. The Tupperware containers with tough stains are soaked in dish washing detergent. Add 2 tspns of the dish washing detergent to 1 litre of luke warm water and soak the Tupperware container in it. Reduce the water as per the size of the stained container. Let it remain for 2 to 3 hours and you get best results.
Easy ways to remove stains from Tupperware: Use the sun
Sun is a powerful natural resource and you can take full benefit by placing the stained Tupperware containers in broad sunlight for drying. Let the containers remain in direct sunlight for about 6 hours and then wash the container with dish washing liquid. The stain will be gone or at least get faded considerably.
Easy ways to remove stains from Tupperware: Baking soda and salt
Another method practiced by few homemakers with superior results is one of the simplest stain removal techniques. Mix some baking soda and salt and wash your Tupperware food containers just as you would with regular dish washing detergent. The baking soda cleans the stains while the salt acts as an abrasive. After the scrubbing is complete, wash the containers out with normal dish washing detergent and you’re done.
Easy ways to remove stains from Tupperware: Use bleach
This is one method that achieves double results with one process. Fill your sink with warm water about halfway, and then add about a half cup of bleach. Submerge the stained containers and let soak for an hour. This is a great way to get your kitchen sink clean as well. Both your Tupperware container and your kitchen sink will be sparkling clean.
Easy ways to prevent staining
As the old proverb goes…Prevention is better than cure. Follow this little trick to help keep your Tupperware container stain-free. Before you transfer the food into Tupperware food container, you need to simply spray the inside of the container with some cooking spray. This will help keep the food from sticking and staining the Tupperware. When you go to wash the container, the food will be easily washed away without staining.
Cooking sprays can be sprayed during cooking to minimize consumption of oil and calories. Cooking sprays are available in Indian market too.
Try some of these techniques next time you have stained Tupperware that you need cleaned. If you know of any other methods please mention in the comments.
Also read: How to remove white marks or hard water stains from Bathroom buckets
Tips for Winter Wear Clothes Care and Storage
December 10, 2014 by admin
Filed under Cleaning Procedures and Measures for Controlling Pests, Home Management Tips and Information
Win ter days are here again…It is time to start using winter clothes, sweaters, scarves, jackets, shawls and other accessories. A little pre-work will help you to use fresh smelling winter wear. Winter wear clothes need to be handled with care to maintain the texture, warmth and comfort. Wool coats should be dry cleaned at the beginning and at the end of the season.
Most important rule to adhere before cleaning your winter clothes is to look at the label and follow the instructions.
Most of the woolen clothes are recommended for dry cleaning. Basic reason being that wool fibers will swell if washed in water, which can distort the shape of the sweater.
But if the label indicates that you can wash your woolen garment, follow these home care tips to clean sweaters:
- Use a mild, neutral detergent and ensure it is thoroughly dissolved in cold water.
- Soak for 5 to 10 mins, then gently swish the sweater around in the water and rinse using cold water until it runs clear of soap.
- Do not wring the sweater with your hands or dry it in the dryer of washing machine.
- The best method is to lay the sweater out on a white towel and gently blot the excess water away. Leave the sweater on the towel / bed sheet on a flat surface and let it dry in a well-ventilated area.
- Slow drying is recommended because high heat can causes unnecessary wear and tear
- If you observe wrinkles after hand washing, use an iron for pressing. If you need to press cashmere sweaters, place a clean towel or bed sheet between the sweater and iron to prevent the heat harming the garment.
Remove light stains on wool:
Remove light stains on wool by blotting (not rubbing!) with cold water or club soda using absorbent cloths or paper towel.
Cleaning coats:
Cleaning coats and jackets depends on your environment. If you are placed in a busy area then clean coats twice in a month. Dust and dirt particles can get into the weave of the coat and will wear the fabric down like sandpaper
Cleaning scarves and shawls:
Anything that is close to the body needs to be cleaned more. Preferably consider hand-washing your wool scarf or shawl once a month to keep it in tip-top shape. If the scarf material is delicate consider dry cleaning.
Cleaning accessories-gloves and mittens:
Fabric gloves can be washed but the process tends to distort the shape. Leather gloves are more durable than fabric gloves and can usually be wiped clean with a damp cloth when dirty.
Storing winter items isn’t always the same as in other seasons:
- Allow all wearable items, including footwear, one day’s rest between wearings.
- Do not store near direct light or heat.
- Make sure items are completely dry before storing to prevent damaging mildew
Winter clothes storage tips:
Clean your clothing prior to storing: Pack your clothes only after washing them-wet or dry wash. This will help repel pests and reduces stains that would be set in if left on the clothing for the storage duration. The biggest risk If you do not wash prior to storage is that you will be greeted by moths, beetles, ants and cockroaches once winter season begins.
Identify a suitable container to hold your winter clothing: Large Polythene bag is an inexpensive option but they can get punctured leaving it open to dust and pests. Similarly storing in cardboard boxes also gives a moist smell after the rains. Plastic boxes are the ideal option to keep away pests and moisture. You can also store in luggage bags for good storage over a long duration.
Keep clothing fresh : Add a few moth balls and ensure pests stay away and help protect your winter clothes in storage.
Store like items into the same container: To make unpacking the containers easier next year, place all your sweaters in one container and all your woolen accessories in another. Continue through your winter wardrobe in such a fashion until everything has been put away.
Stack winter clothes in appropriate storage place: After season is over find the perfect place to store your winter clothing. You can slide the storage container-bags under a bed such that it does not block the path.
A storage unit, attic, closet floor, shelf are also places to consider. If you do not have anywhere else to put your boxes or containers, or if you are in need of a small table somewhere in your home, you can stack a few containers on top of each other and drape a cloth over them, creating a homemade table.
Right storage will help access winter clothes next season. Please add a comment and, if you like the post, feel free to share it with your friends. You can also visit our facebook page and Google plus page for more insight on other articles.
Also read:
Preserving Clothes from Pests Using Neem Leaves
How to remove candle wax and bubble gum stuck on clothes
How to Remove Grease Stains on Jeans
15 Tips to Manage Space and make your home look larger
Tips to improve efficiency of your Air Cooler this Summer
June 11, 2014 by admin
Filed under Cleaning Procedures and Measures for Controlling Pests
 With summer at its peak air coolers provide cooling to the room and relief from the humidity and heat around. Air coolers have become indispensable gadgets at home. The efficiency of the air cooler is critical to beat the external heat.
During summer the external environment is dusty and the dust will settle in the air cooler, therefore you need to clean it periodically.
Many of us do not follow the cleaning process as required and then end up with cough and breathing problem. The air cooler should be cleaned once a week of all dust and dirt accumulation. The water needs to be replaced once a week to avoid breeding of germs and bacteria.
Tips to clean the air cooler (during regular use)
- Disconnect electrical connection. This will avoid any electrical shocks as you are working with water.
- Drain out all water in the base tank. Dispose this water. Scrub the base with detergent and then flush with clean water. Pat dry the tank with sponge or soft cloth.
- Ensure no water falls on the electrical wiring and motor during cleaning process.
- Remove the side covers and wash the pad cloth externally. When it dries fix the side covers to the air cooler.
- Change of cooling pads is recommended annually. But if you are observe a foul smell, it is high time you changed the khas khas grass/ vetivar root pads. You need to replace atleast once in two years to keep away bacterial infestation and foul smell.
- Oil the motor such that it runs smoothly and no jarring noise.
- Clean the fan blades of the air cooler with a damp cloth to wipe away dirt.
- Once the cleaning is completed, fill water in the tank and 1 cap of Dettol/ Lizol disinfectant. This will keep away bacteria and the room will smell good and clean too.
- Preferably avoid local made perfumes for air cooler as this will bring down the life of the vetivar root pads . The grass will deteriorate and start smelling.
Avoid surprises during Start up
We had two big surprises this year . Initially the air cooler did not start , we called the technician and he checked the wiring and the cooler started. It was a simple loose connection problem as an outcome of rigorous cleaning.
The second surprise was that the air was blowing at one place only and not getting distributed in the room, the technician confirmed that the ASM (Auto Swing Motor) was not working. This caused lot of inconvenience as the other occupants were not getting cool air.
After request and negotiation for price he decided to replace the spare. The ASM was replaced and then what a relief…. there was a big smile on the faces of kids too. The sweat that settled on our faces and clothes slowly started to evaporate and we were feeling fresh.
Read on: Tips to Keep Your Fruits and Vegetables Fresh in Summer
Regularly clean and enjoy clean air. Likewise when the monsoon sets in it is time to pack the air cooler. Follow proper cleaning methods and shift the air cooler to a dry area.
Tips to clean the air cooler (when not in use)
Follow Points no.1 to 4 and 7. Wrap the air cooler with a large old bed sheet. Wrap a polythene cover to prevent dust, water entry. Tie the ends securely with a plastic rope and shift it to the allocated place. Remember the resting time is 7 to 8 months therefore let the pads dry sufficiently. Securing completely will prevent any insects making their base in the air cooler that not in use.
Read on: How to keep your Home cool during Hot summer
Great Tips to Reuse Old Toothbrushes
May 20, 2014 by admin
Filed under Cleaning Procedures and Measures for Controlling Pests
 Dentists recommend that you replace your toothbrush every 3 to 4 months or earlier depending upon the bristles getting frayed. You need not dispose these toothbrushes, the old toothbrushes can be reused at your home in several ways. On priority you need to identify the old toothbrushes with a permanent marker and clean the brush prior to reuse.
How to clean the old toothbrush
- Primary reason for cleaning the brush is to avoid any spread of germs. Since these brushes were used orally, it needs to be soaked in warm water and bleach solution for an hour’s time.1:1 ratio of vinegar and water solution is also good to remove all germs.
- Label the brush with a permanent marker so that it doesn’t mix with the regular brushes.
Reuse your old toothbrush for cleaning:
- You can quickly clean the grotty build up around taps, between tiles and the area between wall and floor of your bathroom.
- Kitchen sinks is another critical area that can be addressed with an old toothbrush. The gaps in the metal can be thoroughly cleaned of sticky build up.
- Clean hard to reach areas eg: AC grills, cooler rails, venetian blinds. Clean with dry brush and later wipe with a wet cloth.
- Clean the computer keyboard and monitor. Also note that you should not use an old toothbrush for cleaning LCD and flat panel monitors as the bristles can damage the surface.
- You can use old toothbrush for cleaning cutlery- Forks, around the tea cup handles, Tea filters, the vegetable grater which attracts oil in the gaps and becomes brown in color.
- Ideal for cleaning the intricate design on delicate jewelry such as rings, earrings, daily wear chains which gathers oil and dust and looks dull. I soak the jewelry in soap water for 15 mins and then run the brush thru’ the designs to get a clean product.
- You can quickly remove soil deposits on the shoe sole. Handy during rainy season when the shoe and sandal sole will get clogged with the damp soil.
- Very handy to dry clean the seams on shoes where the leather meets the sole.
- Very useful to clean the bottle threads especially the pickle jars, Oil containers, baby bottles.

- Very handy to apply color to hair, you can straighten your unruly eye brows. Clean your finger nails and remove hidden dirt especially after gardening.
- If the end of the slim brush has a hole you can cut off the top side, smoothen it and use it as a perfect threader for the elastic tape of a knicker, cord for a curtain, pajamas, lehangas, sari petticoats,etc.
- Clean dust from the corners of wood furniture, wall edges just above the marble tiles, design work on beds where dust settles on the protruded surfaces and which is difficult to clean with a wet cloth. Dust in crevices you cannot get to with conventional methods.
- Clean Soap tray when you observe soap deposits in the base.
- Toasters. Microwaves. Coffee Machines. Use a toothbrush to clean off crumbs and stains that fall in those hard to reach spaces.
- Clean your hair combs after soaking in soap solution for 15 to 20 mins. You will be amazed to see your hair brush looking new.
- Clean and exfoliate your feet . Soak your feet in lukewarm water in which salt is added. After 20 mins use an old toothbrush to clean the toes, the feet lines and gently scrub dead skin cells to make your feet look neat and clean.
- You can clean the bottom of buckets and mugs where grime has collected and can be a hygiene risk. Especially cleaning is required in crevices and around the raised letters of the name/logo of the manufacturer.
- Clean artificial flowers and plants and make them look clean and attractive in your home.
Don’t throw out your old toothbrushes. Instead, use them to clean a host of varied items and small or hard-to-reach areas and crevices. Later you can dispose the old toothbrushes after re-using them for a week to 10 days.
If you liked the article or know of other reuses of an old toothbrush, do mention in the comments.
Further reading: How to Remove Stains from Tupperware containers
Getting rid of Egg smell
April 29, 2014 by admin
Filed under Cleaning Procedures and Measures for Controlling Pests
 Eggs are loved by young and old alike. Eating eggs will cause the odor to linger on which is annoying. At times your hand, the plate or the frying pan also smells of egg even after washing the utensil. If the egg omelet has burnt on the pan, the situation is worse. The entire neighborhood will smell the burnt odor and the smell is bound to stay indoors for a long time. Boiled eggs are good for health. Over boiling eggs in the utensil will leave a foul odor that is difficult to remove with regular washing. This article will give tips on getting rid of egg smell and how to avoid smells in the kitchen.
To remove egg smell from utensils
 Lime juice: To remove egg smell out of plates, pots and utensils after cooking and eating, wash them with pure lemon juice. You can also pour the lemon juice onto a cloth and rub it onto the items that are offending your nostrils. Leave them for about 20 minutes and then wash as usual. This technique will completely remove egg stink.
Vinegar: If you are using plastic dishes, you may find that you are having an issue with a lingering smell of eggs after use. Try spraying them with vinegar after you wash them. Leave it on for a few seconds, and then rinse the dishes as usual. This will get rid of the smell without harming your food or your plates.
Baking Soda: Baking soda is a wonderful product to get rid of funky smells, and egg is no exception. Soak the dishes in a solution of baking soda and water to get rid of any leftover egg odor. You need to give a second rinse to remove any lingering baking soda powder prior to usage.
Dry dishes in sunlight.
After regular washing leave the bowl for drying in sunlight for a few hours. This really works to get rid off egg smell. To remove egg smell from hair Remember not to use hot water to wash your hair after application of egg on head. Wash your hair with cold or lukewarm water and rinse with lime juice. Squeeze the juice of 1 lime, filter and spread it over wet hair. This will remove the raw egg smell and you will feel fresh too. Now the next tedious task is getting rid of egg smell from the bathroom. Sprinkle some salt on the tiles and sides of the wall and spray water after 5 mins. This will remove the raw egg smell and make your bathroom smell fresh.
To avoid egg yolk turning gray after boiling
 Tip: Remove the boiled eggs from hot water and transfer to a vessel containing cold water. This will avoid color change of the yolk.
How to Remove Grease Stains on Jeans
April 17, 2014 by admin
Filed under Cleaning Procedures and Measures for Controlling Pests
Grease stains removal is a tough task. This problem is faced by every individual traveling in common vehicles and associated with automobiles. The stain looks shabby and may stain other clothes on contact. Keep the stained clothes segregated while storing and washing too.
The reason for writing this article is to share the experience we went thru’ at home with grease stains on jeans.
Background:
 My son studying engineering came back home after his main project at the loco shed. His jeans was having grease stains especially near the knees and thighs and the seating area. He was disheartened as it was his favorite jeans. I was disappointed seeing the large grease stains on his jeans that was purchased a few weeks back. The thought of washing this stained jeans was painful and I postponed the task for around 2 days. I made enquiries with my friends and then I got the solution to the problem.
We washed the grease stain patches with kerosene and lo…after much scrubbing the stain got away. There was a big smile on our faces and we applied regular laundry detergent and dried the jeans. A combined smell of kerosene and fabric softener was disturbing after the jeans was dried. My son who is very particular of odors was not willing to use the jeans.
Now my next mission was to remove the odor from the clothes. We tried with fabric softener, antiseptic solution and finally dipped it in diluted vinegar. After 2 to 3 washes and buckets of water wasted we could get rid of that odor.
It was almost 2 weeks when he could use the jeans again. Then I understood the simple logic that oily substances can be easily broken down by washing up liquid. This method avoids the usage of powerful fabric detergents that could damage the fabric as bleach.
Ingredients required for removing greasy stains:
Use regular dish washing detergent. Odorless solution is best, but if your dish washing detergent is having color never mind, dilute the solution with water prior to application.
White Vinegar: White Vinegar is an ideal ingredient to remove tough grease stains. Added advantage is that the white vinegar will remove detergent after the cleaning process.
Ensure you use safety glasses and rubber gloves while scrubbing the fabric vigorously. Both the ingredients may cause irritation if it gets into the eyes accidentally.
How to remove stubborn grease stains
The process is relatively simple when compared to the earlier incident I narrated in this article.
- Place the garment and spread the dish washing detergent over the stained area on the jeans.
- Ensure the dish washing detergent solution enters thru’ the fabric. Scrub the area gently, the grease stains starts getting dissolved as dish detergent is good at absorbing grease directly.
- Rinse the detergent with white vinegar.
- Now rinse the entire garment in water and wash normally.
- If the stain is tough, repeated scrubbing with dish washing detergent and white vinegar to completely remove stain. Mostly 2 to 3 repetitions will remove the tough oily stain.
Do a test of your dish washing detergent on a hidden area of the fabric for eg: hand cuff or hem, to make sure that it will not discolor or stain your clothes.
If you do not have time to spare go ahead with Dry cleaning services.
Dust Allergy? Smart ways to keep Dust out of your home
January 8, 2014 by admin
Filed under Cleaning Procedures and Measures for Controlling Pests
Comments Off
 Dust is a problem that affects everyone especially those who suffer with dust allergy. There is dust all around us. We will not able to see dust with our eyes, unless thru’ a ray of light in a dark room. The dust all around us settle on the surfaces and keeps multiplying. People and clothes are the main contributors for dust.
Household dust mainly leads to breathing problems and stuffy nose. Our skin constantly sheds microscopic flakes of dead cells. The fabrics and clothes around us shed lint in the air. Lint of winter clothes are visible, they are like fine strands of hair.
It is impossible to eliminate dust completely, yet there are steps you can learn and follow to reduce dust in your home, this will solve the problem to a large extent.
The first line of attack against dust is prevention.
- Put heavy-duty doormats at the entrance of the house. Place street foot wear outside the house. Keep another set of foot wear for internal home use. This will prevent dust entry to a large extent.
- Do not leave clothes in the open. They collect dust. Keep unused clothes, winter clothes into bags, cupboards. This will avoid dust accumulation. Clean the covers at a regular frequency.
- If your house is heated and /or cooled by a central system, you can change the filters as a means of controlling dust levels in your air. Clean at a fixed frequency-monthly.
Capture dust. Do not allow dust to spread across.
- Avoid dusting the surfaces. You can use a wet cloth to wipe dusty surfaces. Use a vacuum cleaner to remove complete dust.
- Preferably use multipurpose wipe cloth (Prism brand / Origami available at the super market near your home) to clean surfaces. Use electrostatic cloth to clean surfaces. The advantage is it does not spread the dust across. All dust is absorbed and can be washed and rotated for further use.
- Similarly furniture, venetian blinds and table tops can be cleaned with a wet cloth. You can recycle old banian cloth. This absorbs dust and leaves a clean surface.
- Curtains for door and windows can be dusted with a vacuum cleaner. If they can be washed in a machine, schedule it thrice a year.
Replace bedspread , sofa liners and accessories weekly
- Change the bed sheet and pillow covers weekly. Wash them as they collect the maximum dust.
- Precaution should be taken to avoid dust spreading while removing the bed sheet. While removing the bedspread, slowly roll them out.
Read: Top 6 Chemical Free Cleaners Hiding in your Kitchen
Clean surfaces that attract maximum dust
- Dust settles mostly on horizontal surfaces. Clean or vacuum the surfaces weekly. The vertical surfaces can be cleaned in a higher frequency.
- Avoid cluttering the floor with items. This will prevent you from cleaning the house completely. You will stack things and that area will go unattended leaving huge pile of dust.
- Clean the highest surfaces first and work your way down, so you capture any dust you missed.
- Walls also has to be addressed once a month. It is observed that usually the cobweb cleaning is taken care of promptly. The dust layer is seen on wood surfaces of racks, cupboards, drawers, bed etc. The same dust is attracted on walls. Dry dust the walls with electrostatic cloth for maximum coverage.
Beat your sofa cushions, rugs and carpets once a quarter
- You can even dust the rugs, carpet, sofa cushions out in the open once a quarter. Place covers over mats, sofa cushion, bed mattress. You can wash the covers once a month.
- Dust your bed mattress once in a quarter. Use a nice long stick to beat and remove dust. Take the mattress out in the open and do the dusting.
 If you have a carpet, vacuum them weekly. This will minimize dust accumulation. If ignored the dust will spread all over the room and give a musty smell in the room.
Dust is made up of all kinds of particles including plant pollen, dead skin cells, and fibers from clothing and paper. When dust accumulates, it is irritating due to the foul smell it creates and the health problems that continue on asthma and allergy sufferers. To make matters worse, with dust come dust mites. While it’s impossible to completely rid your home of dust, follow the smart ways mentioned to keep dust out of your home.
Keep dust at bay and have a sound sleep. Give your suggestions and inputs in the comments, to prevent dust from entering your home.
Read: A cleaning routine that works in real life
HOW TO KEEP YOUR KITCHEN FREE OF GREASE
October 30, 2013 by admin
Filed under Cleaning Procedures and Measures for Controlling Pests
Comments Off
 Cleaning the kitchen and working platform is vital to ensure that your family is protected from contaminated food. A dirty kitchen and platform could lead to contamination of food that is to be consumed, further leading to an illness or ailment of the digestive system.
Indian cooking involves usage of oil in almost every dish be it a curry, a chutney or a fry item. The chances of oil spread is very high. The oil and smoke circulates along with the air and settles down on all open surfaces.
Cleaning the oil spots from your kitchen cabinets is a quick and easy task if you know how to clean it. How does the oil settle on the kitchen surfaces which includes tiles, exhaust, cabinets etc. You will observe that oil splashes and spread all over the counter when we do seasoning for curries, deep fry eatables.
The oil vapors settles on the cupboards and cabinets. Dust in the air is attracted to this oil droplets and this becomes a layer. The vulnerable areas in the kitchen is the area behind the stove, the stove top exhaust , exhaust fan fixed on the wall. All tile surfaces get affected if not cleaned for some time.
The product you use should be capable of removing the stubborn grease on surfaces. You can clean kitchen cabinets made of wood with warm water diluted with liquid soap cleaner in a 1:2 ratio. Use a good scrubbing pad to dip in the solution and clean the surfaces.
Oil spread or spilled on clothes is another mis. Read this article HOW TO REMOVE STAINS FROM CLOTHES to understand the solutions
The inner surfaces of cabinet door handles will be very sticky and you need to use a small tool to dig the grimy oil collection. If the cabinet surfaces are colored wood, do a spot test and confirm prior to proceeding further.
However, if the oil stains, grease build-up high then opt for the natural way of cleaning, use vinegar. It is a natural cleaner and removes oil stains pretty easily.
- If you use vinegar then use a solution of half part vinegar and half part water if the stains are light.
- If the oil stains are stubborn, then you can use vinegar without using water. Pour undiluted vinegar into spray bottle and spray onto surface. Let it remain for 10 to 15 minutes. Wipe clean with dishcloth or non-abrasive scrubber.
- Lime and club soda can also be used to clean the oil spots and grease build-up from the kitchen cabinets.
- You can clean stove top exhaust hoods with baking soda. On a damp sponge add some baking soda and wipe the surface down. Immediately follow wiping of the surface with a clean cloth to remove any powder residue.
- Clean the kitchen platform by wiping with a cloth dipped in vinegar. The acidic content of the vinegar cleans and removes all grime that accumulates on the platform.
- Similarly, cleaning your stove with a cloth dipped in vinegar removes all spill stains and leaves your stove shining.
- Do not allow water to stagnate on the platform. Clean dry the stove and platform.
- Clean your stove and kitchen platform after cooking. This will remove all dirt, oil and will keep insects in the kitchen. If the platform is left uncleaned, lizards, ants and cockroaches will crawl all over the area.
- Watch out for the cupboards that are fixed on the wall. Check if the plaster on the wall facing the kitchen platform is intact. I’ve observed cracks in our neighbors home where thin layer of plaster keeps breaking and falling on the platform. This mainly occurs when the cabinets are opened to take out kitchen groceries.
To keep your kitchen neat and orderly spend 15 to 20 mins daily to organize and segregate. This will keep insects and chaos at bay.
PRESERVE CLOTHES FROM PESTS USING NEEM LEAVES
October 18, 2013 by admin
Filed under Cleaning Procedures and Measures for Controlling Pests
 Your favorite silk saree gifted on your 1st wedding anniversary is smelling foul as it is seldom used. You are also seeing signs of damage at the folds of the sari. This is a common observation for clothes packed in boxes or covers and kept in cupboards. The problem is severe for clothes lying in open cupboards as it is exposed to dust and infestation of silverfish and mites. In the rainy season clothes attract fungus due to dampness in the air and they cannot be worn due to bad odor.
Maintenance of clothes and books is an essential factor for home management. Naphthalene balls are commonly used in homes. The naphthalene balls evaporates in the air and will keep away mites and insects. Main disadvantage of using naphthalene balls is the strong odor on the clothes and discoloration to the metallic work done on clothes .You need to be careful with clothes that have zardosi work ,silver and gold threads used in embroidery work becomes pale.
The clothes that require delicate handling are silk saris, sari with zari work, Woolen clothes, Chiffon and other delicate materials. The mites and silverfish attack clothes stored in metallic cupboards too.
You can preserve your clothes and make them smell good. Nature has provided mankind with a natural ingredient to protect clothes from deterioration and lasts longer. Neem leaves are having anti-pest and anti-fungal properties. Use Neem leaves and preserve your favorite clothes so that you can wear them with pride.
Follow this procedure for protecting clothes from pests by using Neem leaves:
- Pluck 10 to 15 bunches of fresh green Neem leaves.
- Dry the Neem leaves under the shade.
- Take a cloth large enough to wrap your silk sari or favorite dress.
- Spread the cloth on a flat surface.
- Spread a handful of dry neem leaves on it. Place the sari or dress on the leaves.
- Spread another handful of dry neem leaves on top of the sari /dress.
- Wrap the dress with the cloth and store.
You can be assured that the clothes remain fresh even if you do not use the sari / dress for 2 to 3 years also. There will be no signs of pest infestation especially silver fish or mites and there will not be any odor or discoloration.
An important observation is that dry Neem leaves do not leave any color on the clothes.
Tips:
- It is important to dry the Neem leaves in shade . If the leaves are dried in the sun, the essential oil of the leaves will evaporate reducing the potency of Neem leaves.

- To avoid dry Neem leaves falling on the floor when the sari / dress is taken out from the wrapped cloth, place dry neem leaves in small cloth pouches. Place one pouch each on top and bottom of the dress.
- It will be convenient to place the pouches containing dry Neem leaves in the pockets of Coats, jackets and trousers. This will preserve the clothes.
- Pouches containing dry Neem leaves can be kept in the Books and clothes Almirah. This will keep away the musty smell which develops in the Almirah during rainy season.
You can preserve your costly and favorite clothes in an inexpensive and guaranteed method. Your clothes will remain fresh , smell fresh and will not develop and mite/silver fish . You can follow the same method and extend the life of books and clothes.
There are several benefits of neem leaves at home. Best Insect free Storing tips for Rice and Dhals
BEST INSECT FREE STORING TIPS FOR RICE AND DHALS
September 30, 2013 by admin
Filed under Cleaning Procedures and Measures for Controlling Pests
Comments Off

 Rice and dhals when kept for long time get infested with pests and thus get spoilt. In the current situations one month itself is a big time for pests infestation in dhals. To preserve them for a long time it is advisable to use natural products instead of the chemical preservatives available in market. Mother Nature has gifted us the Neem tree which is like a ‘Kalpavriksh’. Neem leaves is the best naturally available pesticide, insecticide and germicide. Neem preserves the cereals and pulses (Rice ,wheat, any type of whole or broken pulses) without any side effects.
General guideline is to avoid usage of artificial preservatives for your grains when nature has provided mankind a natural preservative.
It is annoying to see flying insects inside the dhal and lentil containers. The insects will bore the dhals and peas and they will leave a residue in the bottom of the container. In the rainy season the rain the problem becomes intense.
Material Required for Preserving 1 kg Grains, Rice or pulses:
- 30-40 Neem Leaves
- Thin cotton cloth (muslin or lining cloth)
Direction for Preserving Grains:
- Pluck fresh green Neem leaves and shade dry them. (It will take 2-3 days during summers to shade dry Neem leaves and 5-6 days during winters )
- Keep approximately 10 dried leaves aside.
- Crush rest of the leaves to coarse powder.
- Make 4cm x 4cm pouch of the cloth.
- Fill the cloth with coarse powder of dried Neem leaves.
- Stitch the open end of the pouch to seal it nicely.
 If you are storing larger quantity i.e app 10 kg of rice or dhals , make 5-6 pouches of the same size. Follow below mentioned procedure:
- Spread the dried Neem leaves kept aside on the bottom of the container and cover with cotton cloth or dry paper.
- Fill 1/4 grain in the container.
- Place two pouches at two corners of container on the grain and then fill half of the remaining grain in the container.
- Keep the remaining two pouches at the other two corners of the container and fill rest of the grain.
- Place the remaining two pouches on the top of the last layer of grain.
- Close the lid of the container, the grains will remain pest free for almost a year.
Tips:
- Do not use synthetic cloth or plastic sheet to make the pouches because the essential oils of Neem which has anti pesticide effect will not be able to permeate in the grain.
- Do not dry Neem leaves under the sun because it will cause most of the essential oil to evaporate and the effectiveness of Neem will decrease.
- It is advisable to buy commodities in smaller quantities. Store them in air tight containers to prevent pest infestation due to improper sealing. In current time most people are moving into apartments and there will be space constraint. In nuclear families the consumption is less and therefore 250 gms purchase also will take over a month’s time to complete.
- It is a good practice to place dhal in air tight containers, place them in the sunlight week once a fortnight . Removes smell and dhal remains fresh. For smaller quantities place bay leaves. It will keep away insects.
Watch outs:
- If you mix the shade dried leaves directly with the grains for storage, it will become a tedious task during usage of rice or pulses. This will cause hassle in cleaning before use. The dried leaves will break coarsely while dispensing. It is advised to use cotton cloth pouches to avoid the hassle.


