

Getting rid of Egg smell
April 29, 2014 by admin
Filed under Cleaning Procedures and Measures for Controlling Pests
 Eggs are loved by young and old alike. Eating eggs will cause the odor to linger on which is annoying. At times your hand, the plate or the frying pan also smells of egg even after washing the utensil. If the egg omelet has burnt on the pan, the situation is worse. The entire neighborhood will smell the burnt odor and the smell is bound to stay indoors for a long time. Boiled eggs are good for health. Over boiling eggs in the utensil will leave a foul odor that is difficult to remove with regular washing. This article will give tips on getting rid of egg smell and how to avoid smells in the kitchen.
To remove egg smell from utensils
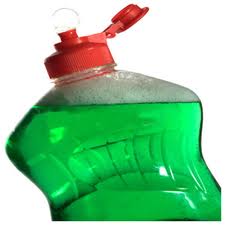
 Lime juice: To remove egg smell out of plates, pots and utensils after cooking and eating, wash them with pure lemon juice. You can also pour the lemon juice onto a cloth and rub it onto the items that are offending your nostrils. Leave them for about 20 minutes and then wash as usual. This technique will completely remove egg stink.
Vinegar: If you are using plastic dishes, you may find that you are having an issue with a lingering smell of eggs after use. Try spraying them with vinegar after you wash them. Leave it on for a few seconds, and then rinse the dishes as usual. This will get rid of the smell without harming your food or your plates.
Baking Soda: Baking soda is a wonderful product to get rid of funky smells, and egg is no exception. Soak the dishes in a solution of baking soda and water to get rid of any leftover egg odor. You need to give a second rinse to remove any lingering baking soda powder prior to usage.
Dry dishes in sunlight.
After regular washing leave the bowl for drying in sunlight for a few hours. This really works to get rid off egg smell. To remove egg smell from hair Remember not to use hot water to wash your hair after application of egg on head. Wash your hair with cold or lukewarm water and rinse with lime juice. Squeeze the juice of 1 lime, filter and spread it over wet hair. This will remove the raw egg smell and you will feel fresh too. Now the next tedious task is getting rid of egg smell from the bathroom. Sprinkle some salt on the tiles and sides of the wall and spray water after 5 mins. This will remove the raw egg smell and make your bathroom smell fresh.
To avoid egg yolk turning gray after boiling
 Tip: Remove the boiled eggs from hot water and transfer to a vessel containing cold water. This will avoid color change of the yolk.
How to Remove Grease Stains on Jeans
April 17, 2014 by admin
Filed under Cleaning Procedures and Measures for Controlling Pests
Grease stains removal is a tough task. This problem is faced by every individual traveling in common vehicles and associated with automobiles. The stain looks shabby and may stain other clothes on contact. Keep the stained clothes segregated while storing and washing too.
The reason for writing this article is to share the experience we went thru’ at home with grease stains on jeans.
Background:
 My son studying engineering came back home after his main project at the loco shed. His jeans was having grease stains especially near the knees and thighs and the seating area. He was disheartened as it was his favorite jeans. I was disappointed seeing the large grease stains on his jeans that was purchased a few weeks back. The thought of washing this stained jeans was painful and I postponed the task for around 2 days. I made enquiries with my friends and then I got the solution to the problem.
We washed the grease stain patches with kerosene and lo…after much scrubbing the stain got away. There was a big smile on our faces and we applied regular laundry detergent and dried the jeans. A combined smell of kerosene and fabric softener was disturbing after the jeans was dried. My son who is very particular of odors was not willing to use the jeans.
Now my next mission was to remove the odor from the clothes. We tried with fabric softener, antiseptic solution and finally dipped it in diluted vinegar. After 2 to 3 washes and buckets of water wasted we could get rid of that odor.
It was almost 2 weeks when he could use the jeans again. Then I understood the simple logic that oily substances can be easily broken down by washing up liquid. This method avoids the usage of powerful fabric detergents that could damage the fabric as bleach.
Ingredients required for removing greasy stains:
Use regular dish washing detergent. Odorless solution is best, but if your dish washing detergent is having color never mind, dilute the solution with water prior to application.
White Vinegar: White Vinegar is an ideal ingredient to remove tough grease stains. Added advantage is that the white vinegar will remove detergent after the cleaning process.
Ensure you use safety glasses and rubber gloves while scrubbing the fabric vigorously. Both the ingredients may cause irritation if it gets into the eyes accidentally.
How to remove stubborn grease stains
The process is relatively simple when compared to the earlier incident I narrated in this article.
- Place the garment and spread the dish washing detergent over the stained area on the jeans.
- Ensure the dish washing detergent solution enters thru’ the fabric. Scrub the area gently, the grease stains starts getting dissolved as dish detergent is good at absorbing grease directly.
- Rinse the detergent with white vinegar.
- Now rinse the entire garment in water and wash normally.
- If the stain is tough, repeated scrubbing with dish washing detergent and white vinegar to completely remove stain. Mostly 2 to 3 repetitions will remove the tough oily stain.
Do a test of your dish washing detergent on a hidden area of the fabric for eg: hand cuff or hem, to make sure that it will not discolor or stain your clothes.
If you do not have time to spare go ahead with Dry cleaning services.
Tips to Keep your Fruits and Vegetables Fresh in Summer
April 4, 2014 by admin
Filed under Home Management Tips and Information
Summer has begun and the availability of fruits and vegetables are in abundance but keeping them fresh for long can be a challenge. Commonly seen issue at every home. Due to time constraints vegetables and fruits are usually bought on the market day or picked from the groceries once a week. Maintaining the quality for a whole week is something each one look forward to. It is observed that the veggies gets crushed or the leaves are bruised, fruits are moldy and you feel sorry for the money that has been wasted.
External heat makes vegetables wilt and lose its freshness. You can try the tips to keep your fruits and vegetables fresh in summer. Extend freshness of veggies in the following ways:
Avoid keeping tomatoes in the refrigerator
 Tomatoes are a basic necessity all year round. Keeping them fresh in summer can be difficult. Most of us store tomatoes in the refrigerator. But did you know that keeping tomatoes in cold temperatures inside the refrigerator rids them of their flavor and transforms their texture in a couple of days. The ideal way to store tomatoes is to put them in a bowl lined with a paper towel with the stem portion on top. Basically the portion around the stem is the softest part in a tomato. If this area gets bruised ,it leads to rotting. Temperature is an important parameter to watch out. Room temperature is ideal, keep away from heat sources and direct sunlight. If the consumption is slow then move around the tomatoes in the bowl to avoid bruising. Your tomatoes will remain fresh for a week.
Carefully wrap your leafy greens
 Plan for consumption of leafy greens within 1-2 days of purchase to ensure freshness and also you get maximum nutrients out of them. In case you need to store the greens, you can ensure freshness by wrapping the unwashed leaves in a paper towel and storing in the refrigerator. Place leafy greens on top. Do not compress the pack or place other vegetable covers / containers over the green leaves wrap .The paper towel will absorb any excess moisture that adheres to the leaf. Replace the paper towel as excess moisture will make leaves rot quickly.
Give a hot water bath for your strawberries
 Come summer and children love strawberries. Berries can go moldy overnight. One way to stop the onset of the fungus is not with pesticides, but by giving your berries a hot bath before storing them. The process known as ‘thermotherapy’ simply involves immersing and swishing berries in in a pot of hot water. The hot water kills off mold spores and keeps them fresher longer. Strawberries, blueberries and raspberries fare best at 125 degrees for 30 seconds. After bathing the berries spread them out on a towel to allow them to breathe and then store.
Freeze your fruits and veggies
If you have purchased larger quantities of fruits and veggies and due to some reason the consumption is not there, you can avoid wastage of the groceries. Simply, chop those ripened fruits and veggies up and freeze them for use on a future occasion. You can freeze items such as bell peppers, green beans, broccoli, cabbage, celery, cucumbers, onions, brinjal, mushrooms, strawberries, blueberries, bananas… and the list goes on! Just make sure you blanch them in hot water before transferring them to cold water. The process is also known as shock treatment. When water is completely drained, these blanched veggies and fruits can be freezed for later use. Blanching neutralizes bacteria present in foods, delaying spoilage.
A few guidelines for storing Veggies and fruits in the refrigerator:
- Do not store fruits and vegetables together.
Fruits that release high levels of ethylene ( the ripening agent) can prematurely ripen and spoil surrounding vegetables.
Storing Vegetables:
- Pack vegetables loosely in the refrigerator. The closer they are, the quicker they will rot.
- Cut the roots end of the coriander leaves. Remove strings / rubber bands and stored in a container lined with paper towel.
- Green chillies will rot faster if the stems are not removed. Remove the stem and place it in a container lined with paper.
- Store Potatoes, Elephant foot(Yam) ,Sweet potatoes, garlic out of the refrigerator.
- Curry leaves (Karyapak ) will remain fresh if stored in a container lined with paper towel. Curry leaves can be washed in cool water prior to storing in the refrigerator.
- Soft herbs and mushrooms should not be washed until just before they are used.
Storing Fruits:
Avocados, tomatoes, mangoes, melons, apples, and pears will continue to ripen if left sitting out on a countertop, while bell peppers, grapes, all citrus, and berries will only deteriorate and should be refrigerated.
 Bananas in particular ripen very quickly, and will also speed the ripening of any nearby fruits. Refrigerate ripened bananas. While a banana in the fridge may find a brown or black skin in just a few hours, what lies beyond the peel remains perfectly edible. The cold temperature of a fridge encourages an enzyme found in bananas (polyphenyl oxidase) to polymerise phenols in the banana skin into polyphenols, which in turn blackens the banana skins. However, the cold temperature also keeps the banana from ripening even further keeping the fruit perfect within
Children avoid eating bananas which has a black skin, try out this trick. Thaw it for 2 hrs atleast prior to consumption.
Read on: Best Insect free Storing tips for Rice and Dhals
Watch outs while buying leafy greens:
- First, when buying greens, make sure they are very fresh.
- Look for vibrant dark green leafies that are crisp and full, not wilted or yellowish.
- Tender leafy greens are typically a little sweeter than more mature, aged leaves.
- Go organic when possible. Non-organic leafy vegetables are high in pesticides.
Certain vegetables are worth buying organic, and greens are one of them.
Read Menu planning saves time in the kitchen.
What is the Best time to Paint your Home?
March 10, 2014 by admin
Filed under Home Management Tips and Information
Comments Off
 This is a common question asked by most individuals when they plan to paint a home. The best time to paint is when the weather is warm without bad weather in the near future since problems can occur if you paint during or shortly before bad weather. You need to be most careful about the exterior painting as all your effort will go in vain. You will observe smudges due to improper drying, dampness and humidity in the air.
The best times to paint for all types of home painting are from the spring to late fall. A general rule is that if it is comfortable for you, then it is good for the paint. Painting is a major activity requiring inputs from all family members, planning on budget, paint colors, alignment for painting schedule.
What is the ideal time to paint your home?
It is recommended to do the painting activity early in the day. Open windows during the day so that the paint will dry faster and the smell won’t be there during the evening. Select a day with no rain expected at least the expected drying time of the paint.
Autumn is a great time to paint. Paint needs time to cure, and rain is its biggest enemy. Intense humidity can get underneath the paint and cause it to bubble.
Temperature conditions to paint your home?
Most paint manufactures recommend 50 F degrees and rising but low temperature acrylic paints can be used down to 35 F degrees.
During warm weather rain is the main problem. Variations like sagging or deep depressions can be the result if it rains just a couple of hours after painting.
Another effect of rain is the lifting of the colorant from the paint or an uneven sheen. This looks like stripes of color on the surface or flat and shiny areas across a surface.
Applying paint in cold weather can have a similar effect and will drastically reduce the life of all paints. Typical effects of cold weather painting are sags, bubbling and cracks in the paint film as it freezes.
For interiors there are no such restrictions, provided the home is kept at a moderate temperature, any type of paint can be applied. However, in cooler temperatures, excessive condensation on windows and slow drying periods can become a problem.
Watch outs while painting your house:
Read the instructions on the paint container carefully prior to dispensing and actual application. Basics to be followed while painting the house-Interior and Exterior.
Sanding is probably one of the most important preparation steps because it creates adhesion. Before you sand, wash the surface. Power washing is also a very important part of the painting process. If the surface is clean of dirt and mildew, the paint will adhere properly.
Place coverings over the heavy furniture that cannot be moved / dismantled at home while you plan to paint. After painting jobs are complete, wash the paint spills with brush and water. If it is an oil paint then apply primer solution and clean the paint spots.
If the painting job is done by 3rd party people it is ideal if the articles are removed and cardboard sheets or drop cloth is placed below the walls to minimize cleaning activity.
Start on top to prevent stripe marks. Whether indoors or outdoors, always begin painting at the top and work your way down.
If you have several paint containers of the same color and brand, it is recommended to combine them also known a boxing the paint. By taking a large bucket and mixing the paint gallons together, you’re ensuring a uniform color.
To save the left over paint, place a piece of plastic wrap on top of the open can. Spray cooking oil over the plastic and tightly secure the lid. Turn the bucket upside down, and you’ll have a brand-new seal. Air won’t get in, and the paint will last longer.
Do not get worried about the thought of painting your house. Choose the best contractor and select the colors that will get along with your furniture and curtains. Get the best of all the efforts. Share your experiences / inputs in the comments.
Menu Planning Saves Time in the kitchen
February 25, 2014 by admin
Filed under Home Management Tips and Information
A common question for most individuals and moms is what to cook for dinner today? Women stand in front of the refrigerator and take an account of the vegetables that are stacked. They stare at the bottled jars in the kitchen pantry and try to figure out what to be cooked for meals.
For Indian homes, cooking is a big deal. Family comprises of people with varying age groups. Three meals a day, seven days a week and all round the year the kitchen tasks goes on. To top it all Indians indulge in too much of snacks and evening special called 4 to 6 pm snacks.
The regular chores in a kitchen and home includes buying groceries from the market and stores, transferring stocks to pantry and refrigerator, planning for the current menu, chopping all stuff, cooking and serving, shifting all soiled utensils to sink, washing utensils etc. This is a routine and at times you get hassled up with all the activities that are going around you.
 Menu planning means that you plan in advance what you want to cook for meals. You will plan all purchases accordingly.
A small deviation in the schedule will delay your meals. To make things easier you can initiate a new idea- Menu planning. Menu planning doesn’t have be complicated! Planning meals ahead requires a small investment of time, but can reap great rewards:
Menu planning saves money: You will save money with lesser visits to the supermarket and grocery stores and therefore will reduce on extra spending each time you visit the store. You will save money by buying larger packs for foods that can be stocked in the refrigerator.
Menu planning saves time: You actually save time by not visiting store often. You plan and buy groceries such that you do not have to borrow from your neighbor. You will not waste time searching for the ingredients or if you have missed thawing an essential ingredient for the dinner tonight.
Menu planning improves nutrition: By not visiting the stores often you allot time for side dishes and complement the main dishes with salads. You ensure seasonal fruits and vegetables are included in the meals with proper menu planning.
There are different ways of menu planning methods that can be adapted to your family as per the lifestyle. You can plan the night before based on the children’s schedule of packing lunch etc. You can decide based on the leftover quantities as decide what best fits for your meals the next day.
You can plan the menu a week or fortnight in advance. You get advantage of the stocks and groceries you purchase. You have total control of your family’s diet and nutritional requirements with good planning.
You can therefore rotate this menu on alternate weeks and ensure your family gets all seasonal requirements too.
I know few families where the children know in advance what’s for breakfast / dinner at home. That’s how menu planning is followed at few homes. They have benefited from this exercise and have continued.
A sample of breakfast would be as follows:

Remember, menu planning will have benefits of saving time and money. This will boost nutrition. Initially you may feel strange when you are referring to the sheet always. But then it is a system that brings in discipline. You will remember to soak the pulses in advance, grind masala’s if you know what’s to be cooked the next day and for the South Indians the coconut is a mandatory ingredient they can plan in advance. You can be assured that your family is getting the best meals – planned diet. You can plan a day in the week for dining out or relying on coupons. This way your family will not crib of not having a change.
Give menu planning a try and see the difference it makes in terms of money and time. Convey your unique ideas in the comments.
What is Dry Cleaning in Laundry services?
January 24, 2014 by admin
Filed under Home Management Tips and Information
 Laundry is a common activity in every home. Clothes segregated for laundry are of various textures and colors. The home maker should decide the combination of clothes to be hand washed or laundered in machine. Dry cleaning clothes saves time for busy professionals and homemakers, it also delivers clean clothes that are thoroughly cleaned and treated with great care.
There are two types of cleaning method: Wet cleaning and Dry cleaning. Many wonder if dry cleaning is cleaning clothes without water.
 Dry cleaning actually means that the clothes are wetted with solvents instead of water. Dry cleaning is recommended for delicate fabrics and clothes that will deteriorate when it comes in contact with water e.g: silk clothes and winter wear. The dry cleaning process is simple and quite environment friendly.
Silk clothes lose its shine and look when handled in wet laundry. The shrinkage of material and the problem of color staining to other clothes usually occur. Dry cleaning will help remove stains and soils from fabric. All stains are not removable with water, you need to apply dry cleaning expertise while cleaning. Clothes that demand dry cleaning has to be addressed for durability and appearance.
Hand cleaning is more economical than dry cleaning, but definitely not effective for all fabrics and textures. Dry cleaning will bring back clothes looking new and prevents color staining, fabric distortion and shrinkage. Prior to washing a new dress or garment, read the label and follow the instructions . The label will have the conditions for wash.
There is another notion that frequent dry cleaning brings down the life of a garment. The myth is wrong, infact dry cleaning extends the lifespan of a garment. The only observation in case of sarees and dupattas are that the edge areas where the fabric is hooked or knotted becomes wider with every dry cleaning.
Inspect your clothes prior to handing over to the dry cleaners. Keep a list of the clothes-colors or prints etc such that you can identify if there is a mismatch at the launderers.
I remember an incident which occurred a few years back when I had given 1 silk saree for dry cleaning along with the other clothes. The dry cleaners delivered all material except one saree. They informed me to come back after 2 days. This happened for 3 visits. I was taken to the store area which had several cupboards to identify my saree. I went thru’ the clothes hung on the racks but could not find my saree. The saree got misplaced or damaged probably…reasons not known. Finally the laundry personnel did not collect the amount for the entire laundry done . I’ve changed the launderers now but I do have memories of that saree in my life. Bygones are bygones. Coming back to the article.
Modern equipment is used for dry cleaning clothes these days. The solvent, detergents are added based on the age of the material and the level of dirt in the clothes for maximum efficiency and consistency. Most cleaning companies use the chemical perchloroethylene (PERC) to remove grease and stains from clothing. The clothes are then loaded into a machine and washed during the tumbling process. Heavy stains are removed by stain removal process. The solvents are removed, filtered and recycled. The clothes are next dried in the dry cleaning machine and taken out for steaming and/or ironing to straighten them. The washed clothes are pressed, straightened and folded at the final stages.
The advantages of the dry cleaning process are:
- It is able to effectively rid garments of various types of grease and oil stains,
- It reduces material shrinkage and deformation,
- It minimizes color staining,
- It protects the original condition of the materials and
- It extends lifespan of clothes.
If you have moved into a new area and are on the look out for a dry cleaning store , be careful prior to sending clothes in bulk. Enquire with your neighbors or friends. To finalize a dry cleaning shop you should give one set and if done well , only then continue availing their services. If you know of other information on dry cleaning process, give your inputs in the comments.
Dust Allergy? Smart ways to keep Dust out of your home
January 8, 2014 by admin
Filed under Cleaning Procedures and Measures for Controlling Pests
Comments Off
 Dust is a problem that affects everyone especially those who suffer with dust allergy. There is dust all around us. We will not able to see dust with our eyes, unless thru’ a ray of light in a dark room. The dust all around us settle on the surfaces and keeps multiplying. People and clothes are the main contributors for dust.
Household dust mainly leads to breathing problems and stuffy nose. Our skin constantly sheds microscopic flakes of dead cells. The fabrics and clothes around us shed lint in the air. Lint of winter clothes are visible, they are like fine strands of hair.
It is impossible to eliminate dust completely, yet there are steps you can learn and follow to reduce dust in your home, this will solve the problem to a large extent.
The first line of attack against dust is prevention.
- Put heavy-duty doormats at the entrance of the house. Place street foot wear outside the house. Keep another set of foot wear for internal home use. This will prevent dust entry to a large extent.
- Do not leave clothes in the open. They collect dust. Keep unused clothes, winter clothes into bags, cupboards. This will avoid dust accumulation. Clean the covers at a regular frequency.
- If your house is heated and /or cooled by a central system, you can change the filters as a means of controlling dust levels in your air. Clean at a fixed frequency-monthly.
Capture dust. Do not allow dust to spread across.
- Avoid dusting the surfaces. You can use a wet cloth to wipe dusty surfaces. Use a vacuum cleaner to remove complete dust.
- Preferably use multipurpose wipe cloth (Prism brand / Origami available at the super market near your home) to clean surfaces. Use electrostatic cloth to clean surfaces. The advantage is it does not spread the dust across. All dust is absorbed and can be washed and rotated for further use.
- Similarly furniture, venetian blinds and table tops can be cleaned with a wet cloth. You can recycle old banian cloth. This absorbs dust and leaves a clean surface.
- Curtains for door and windows can be dusted with a vacuum cleaner. If they can be washed in a machine, schedule it thrice a year.
Replace bedspread , sofa liners and accessories weekly
- Change the bed sheet and pillow covers weekly. Wash them as they collect the maximum dust.
- Precaution should be taken to avoid dust spreading while removing the bed sheet. While removing the bedspread, slowly roll them out.
Read: Top 6 Chemical Free Cleaners Hiding in your Kitchen
Clean surfaces that attract maximum dust
- Dust settles mostly on horizontal surfaces. Clean or vacuum the surfaces weekly. The vertical surfaces can be cleaned in a higher frequency.
- Avoid cluttering the floor with items. This will prevent you from cleaning the house completely. You will stack things and that area will go unattended leaving huge pile of dust.
- Clean the highest surfaces first and work your way down, so you capture any dust you missed.
- Walls also has to be addressed once a month. It is observed that usually the cobweb cleaning is taken care of promptly. The dust layer is seen on wood surfaces of racks, cupboards, drawers, bed etc. The same dust is attracted on walls. Dry dust the walls with electrostatic cloth for maximum coverage.
Beat your sofa cushions, rugs and carpets once a quarter
- You can even dust the rugs, carpet, sofa cushions out in the open once a quarter. Place covers over mats, sofa cushion, bed mattress. You can wash the covers once a month.
- Dust your bed mattress once in a quarter. Use a nice long stick to beat and remove dust. Take the mattress out in the open and do the dusting.
 If you have a carpet, vacuum them weekly. This will minimize dust accumulation. If ignored the dust will spread all over the room and give a musty smell in the room.
Dust is made up of all kinds of particles including plant pollen, dead skin cells, and fibers from clothing and paper. When dust accumulates, it is irritating due to the foul smell it creates and the health problems that continue on asthma and allergy sufferers. To make matters worse, with dust come dust mites. While it’s impossible to completely rid your home of dust, follow the smart ways mentioned to keep dust out of your home.
Keep dust at bay and have a sound sleep. Give your suggestions and inputs in the comments, to prevent dust from entering your home.
Read: A cleaning routine that works in real life
A CLEANING ROUTINE THAT WORKS IN REAL LIFE
December 16, 2013 by admin
Filed under Home Management Tips and Information
Comments Off
 None of us would enjoy being part of an unorganized home. It is a dream to have an organized, spic and span home. When you get information that you are having guests in the evening, you get all tensed up. You can visualize the pathetic situation of your home when you left in the morning. You cannot change the visitors schedule. You are at office and are really worried of the time gap you have at hand to complete the cleaning chores.
You receive a reminder from hubby that the guests may stay back for dinner as their official work got extended. You have got an additional 30 minutes for cleaning. You are breathing at ease now. You can make this situation better if you have a plan for cleaning at home.
The cleaning chores can be made a lot easier if you make a proper schedule of the cleaning activities. Divide the house hold tasks into sub tasks and plan for each task every day. It is not easy to clean each area with much precision and leave for work. Yet you can make your house look clean and organized by applying the following tips.
Understand How essential is Good House Keeping in Home Management
- Dust accumulation should be avoided inside your home as it contains allergens as it ages with accumulation. Dust your door mats daily. Vacuum them once a week.
- Fold newspaper and place it in the designated place. Same with magazines.
- Straighten all folds on sofa spreads and bed spreads.
- Dust the TV , the entrance hall racks lightly to remove collected dust.
- The dining table needs to be cleaned daily of any spills.
- The cooking area needs to be cleaned with a wet cloth. Place all things at the correct places.
- Study tables should be dusted .Dust bins should be emptied daily. This will ensure no bad odors in the kitchen.
- The bathroom and toilet are critical areas that gauge your standards of personal hygiene. Wash the floor daily. Wipe the mirror. Spray the toilet cleaner – Harpic and after 5 minutes scrub the toilet. You will have a clean and fresh toilet. Clean the tiles and other accessories once a week.
- The fridge can be cleaned externally with dry cloth. To do internal cleaning the refrigerator should be emptied and thoroughly cleaned – monthly. Place a lime to remove foul smell.
- Weekly check for stock in kitchen and refrigerator , empty containers and not in use material. Wash the oil container once a month.
- Fold laundry clothes daily. Arrange cupboards and cloth rack weekly. Segregate under garments, socks in different racks such that time is not wasted. You will be able to rotate all clothes.
- Clean the window and grills once a fortnight. Clean with a damp cloth so that dust is not spread across. If your window has a mosquito screen, vacuum it well. If the screen is not getting cleaned sufficiently, remove the window screen and wash it with water.
- Replace the sofa spread covers once a week. Change the diwan covers /bed spread once a week.

- The door and window curtains can be scheduled once in 6 months or as per dirt accumulation.
- If you have kids around , let them have fun playing with toys. Take their help in collecting all toys and placing in the right toy bins or storage shelves.
- Floor mopping should be done only after dusting or dry cleaning of the floor.
Tiny drops of water make an ocean, similarly small efforts in cleaning will enable you to have a clean and shiny house. You can make your home organized with these small tips. Delegate small tasks to family members such that they will participate and feel responsible for the home cleaning too. Do not attempt to clean your home like a hospital room. The family members will not be comfortable being at home with the touch-me-not feeling of all articles and accessories at home.
You need to develop a cleaning routine that works in real life. This will keep you stress free during peak times of guests or visitors at home.
Hope you were able to relate most cleaning tasks to your home. Do let us know if you have novel cleaning ideas , frequencies to keep your home clean and organized.
How to Organize Papers at Home
December 4, 2013 by admin
Filed under Home Management Tips and Information
Comments Off
When organizing your household papers, it’s hard to know which papers need to be kept on hand and which needs to be discarded. Searching for papers, critical bills and receipts is the order of the day.
It is a waste of time and energy. You will end up paying late fees too as you were not reminded on time. You are very engrossed with your daily chores that you miss out on the target deadlines. You can convert this daily chaos into an organized manner by following the simple guidelines on How to Organize Papers at Home.
- Maintain one area of your home for filing of papers. Select a day when you can focus on this activity and you will not have disturbance. Collect all papers and segregate into four sections. Basically arrange 4 cardboard boxes with identification. Identify the boxes with prominent label: personal, legal, home, trash and start sorting all the loose papers.
- Arrange the cardboard boxes close to each other and start the arranging work. You may come across items that belong to your friend / neighbor. Place such items on the main table such that you can hand over to them.
- You need to set up a filing system that is relatively easy to use for your important documents and receipts. Maintain sub categories for each of the main sections such that the documents will be filed correctly.

- Maintain files with different colors, or tabs and labels of different colors.
- Use an album with separators to store important visiting cards. Store in alphabetical order ,it will help you identify when required later.
- Use a miscellaneous file for the papers that does not fit in any category. Review these documents periodically and discard the data that is not valid. At times you will identify a new category based on regular updates.
- Place a basket for incoming mails near the front door, best idea would be to place this basket near the rack containing your home keys and vehicle keys. You will not miss on important mails when you go pick your keys.
- Make filing a habit. File at least once a week. Set aside time to file these papers.
- An important point will be to discard old bills of the previous year. Ensure you have last 3 payment receipts. You may require it for legal submission.
- While cleaning the kitchen you may come across recipes placed in several cupboards . It may be hand written, paper-magazine cutting,etc. Collate all of them and place it in a separate folder in alphabetical order or in categories such as cakes, pickles, desserts, etc.
- Place a clipboard in the common room such that you can place the message or reminders for important payments and important dates.

- As time passes by you will have a lot of docs. Home related docs, children education, certificates, etc. Place important docs in a metal cupboard. This will be a foolproof system from any damages of insects and thefts.
- Place one file for all warranty cards. This will help you quickly address any maintenance requirements and breakdowns.
- Maintain a nice book for all telephone numbers. Download the numbers from your mobile such that it can be useful for people at home, working from home scenario too.
Once you have a system in place for organizing your papers, your home will run efficiently. The document retrieval time has come down, you will be able to locate any document as per the requirement. In addition, you will be better prepared to deal with the inevitable emergencies that will come up as time goes by.
Wishing you all good luck in organizing your papers and in turn your homes.
HOW TO FRY POPCORNS AT HOME SAFELY
November 27, 2013 by admin
Filed under Home Management Tips and Information
Comments Off
 Popcorns happen to be a favorite snack at home for the kids. I do not mind this session as we get readymade packs in the market. We only need to cut the pack, empty the contents in a pressure cooker or a flat thick base utensil.
I used the word safely in the title due to the recent incident that occurred at my home when I was frying popcorn at home. The incident was a near miss, avoiding a burn to my hands / legs. I’m emphasizing this incident to bring in awareness to all.
Frying popcorn is a normal activity in many homes. This process is followed commonly by several homemakers but small negligence can have serious consequences. We normally purchase ACT II pack , it has a range of flavors. The other day when it was drizzling and children were demanding for snacks, I remembered the popcorn packs lying in the cupboard.
I used the small cooker. I heated the cooker for 3 minutes and emptied the pack contents into the cooker. Spread the oily layer uniformly at the base of the cooker. I placed the lid on the cooker and went to the dining hall to collect the bowls.
I heard a loud sound and could identify that it was from the kitchen. I rushed to the kitchen and saw the cooker lying on the floor. The contents were spread on the marble floor. Oh! What a mess. It was a major cleaning job as the floor had oil stains . I had to remove all the corns from the floor. The snack time was extended further. I then took another cooker and emptied a second pack into it.
Must read :HOW TO KEEP YOUR KITCHEN FREE OF GREASE
This time I left a small gap on the cooker lid for the vapors to escape. I could hear the popping sound. I gently lifted the cooker and shook the contents. After 3 to 4 minutes all the corns had fried sufficiently and it was served to my hungry boys.
I took the cooker that fell on the floor. I noticed two impressions on the sides of the cooker. After 2 days I planned to use that cooker. I placed the cooker on the stove for cooking, the steam was leaking constantly. That is when I realized that the lid had been damaged ,to be precise dented when the cooker fell on the floor.
I’m sure it is going to cost big. At the same time I’m thankful to God that the cooker had fallen on the floor only after I left the room. There were no children standing around watching the cooking with curiosity.
The safety lapse that happened was that the cooker lid was placed without leaving any gap for hot vapors to evaporate. Due to this there was an imbalance and the cooker toppled and fell on the floor.
The next time you fry popcorns ensure that you use a sturdy vessel . Leave a tiny gap on the lid .When you shift the lid to check for frying, you will notice the corns jumping out of the vessel. If the lid is kept open, the popcorns will fall all over the stove. The sight is enjoyable when you place a glass lid on the frying pan.
A big learning for this simple tasks. Follow safety norms at all times irrespective of the job involved. Assess the work you plan to do , check the surroundings and only then proceed to do it.
Act II pack can be microwaveable too. Check for the image of Cooker for regular ones and the note for Micro oven variety.
At the end of this posts I want to share a simple method to fry popcorns with dried maize corns.
 Frying popcorn at home:
- Take a wide and thick bottomed vessel. Pour oil to cover the base.
- Add the dried maize corns to be fried. Spread it evenly with a large spoon. Maintain full flame.
- Add ¼ spoon of table salt. You will observe the heat is slowly passing on to the corns. Now place the lid with a small gap on the vessel.
- After 5 minutes put off the flame. You will observed the entire vessel filled with popcorn. A salty tinge will be present on each popcorn.
Hope you enjoy your snack time too…


